
I used to ride bicycle. A lot. Between 2005 and 2008, I commuted to work by bicycle in Reno, NV. It was an 11 mile round trip along a major thoroughfare. While I eventually rode a recumbent bicycle, I started out on a walmart full suspension mountain bike. That lasted a month or less. Then, I purchased and commuted on a late 80’s Specialized Rock Hopper. Several configurations were tried until I found one that worked. Eventually I had 26×1.5″ semi-slicks with kevlar, and Nokian W160 studded snow tires for when the going got slick.
The drivetrain eventually became a fixed gear flip/flop wheel with a 17t and 19t cog on the back, and a 48t chain ring. This was not only extremely robust but a blast to ride. MTB clipless pedals, a Brooks B17 Saddle, a trekking handle bar, and front and rear racks rounded out my tank-like commuting bicycle. I didn’t get a lot of pictures back then, but here are a couple that survived the ages. One of these pictures is of a geared bike with a different frame, but the same basic parts.

The drop bars didn’t last long. But this was a fantastic bicycle, and the culmination of a lot of work and riding.

I rode these handlebars for a long time. They were very good for the purpose and intentionally narrowed.

These are the bars, the saddle, and the tires- different frame/drivetrain.
This bike setup was fantastic. The custom built rear wheel (an IRO MTB hub with a Velocity CliffHanger 26″ wheel, straight gauge spokes) was bomb proof. I’m 300+ pounds, and when you’re riding fixed at speed, you can’t unweight the rear wheel over potholes. I remember once while going under an overpass, where the road actually dipped down and then back up, I was doing about 26mph and hit a pothole dead on, and the rear wheel took the hit hard. I was fully expecting a broken spoke at the least or a dented wheel. Nothing. It was like it never happened. That wheel was worth every penny spent on it.
I thought this was about building a recumbent bicycle?
You’re right- I’m digressing. But to understand why I decided to build a recumbent bicycle, it’s important to see how I got to this point. When I was about 14, I injured my right shoulder in PE at school, and it was in a sling for weeks. About 18 years later this caught up with me, and my shoulder couldn’t take the pressure of riding an upright bicycle. It was time for a change.
Recumbent bicycles that can handle someone as big as I am are prohibitively expensive. A conservative estimate would be about $3000 USD . I didn’t, and don’t, have that kind of money. So I did what any totally insane person would do.
I built one.
Getting Started and counting the cost
First, I had to decide what to build. I needed plans, and a support system. My main resource was AtomicZombie.com, where you can learn how to do exactly what I did. The bicycle I chose to build was the Meridian long wheelbase recumbent bicycle. Their forums are awesome with Brad (the owner) being very helpful along the way when I ran into a glitch or two of my own doing.
I had several bicycles laying around, and picked up some cheap/free bikes for parts.
The only things I had to buy new were 3 bicycle chains, steel, grinding/welding supplies and brake/shifter cabling. Oh, and seat foam and fabric from a local shop.
Tooling up for the recumbent build
Atomic Zombie’s site says you need a hand grinder, some basic hand tools and a welder. With those tools, anyone can build a recumbent bicycle. Really? Yeah. Really.
I didn’t have any of these tools, so spent some money at Harbor Freight for the grinding supplies. A drill and other basic tools were already on hand. What I didn’t have was a welder. What was I to do about that?

Not much to see. A fan, two MOT’s, some wiring and a light switch.
Yeah, I built a welder. It’s actually pretty easy to do, and if you’re not afraid of electricity and have half a brain about safety, then I’d recommend that you build one too. Building stuff is fun!
A neighbor recommended I try 7014 rods, and those worked beautifully. 6013’s are very good as well, and both have their uses. I was pretty surprised by how easy it was to learn to weld, but I have to admit that I made plenty of mistakes. I spent a lot of time grinding out welds and redoing them!
Building a LWB Recumbent Bicycle
Now that I had all the tools, spare bicycles, and plans, it was time to get started. When putting together such a project, embarking on a new adventure, there comes a point when you’re ready to make the first cut- the first weld. It’s nerve wracking, but it’s worth it! Here are some pictures of the build and the final product. Scroll all the way down for some information about how it rode and how I accidentally tested it up to almost 50 miles per hour!
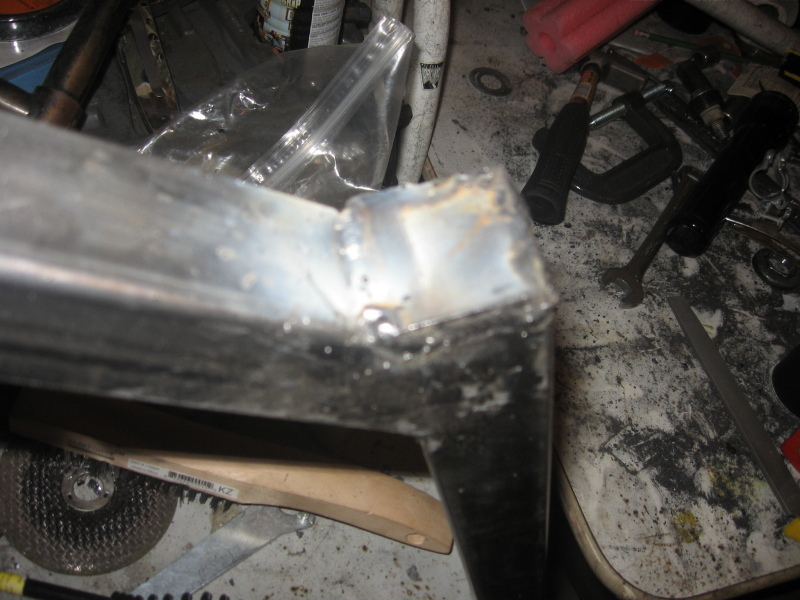
 My horribly dirty garage! The bike is taking shape. |  |
 |  |
 |  |
 |  |
One thing you can notice about this recumbent bicycle. It is long! The length turned out to be the largest problem with this bicycle. As it’s designed, it uses a 20″ front wheel. I did not have a 20″ front wheel and so I used what I had, which was a 26″. I did this the “dirty” way in the sense that I just added length to the front tube to make up for the difference. One issue with a Long Wheelbase Recumbent bicycle is that the weight distribution is not very good. The majority of the weight is on the rear wheel, and therefore most of the braking happens on the rear wheel as well. This also makes the front end very light, and even a little bit twitchy.
I added linear pull brakes front and rear, but unfortunately the front brake was all but ineffective. The rear brake worked fine on level ground around town, but on longer downhills was woefully inadequate!
Braking Bad
I found this out the hard way. In the last picture above, you see the bike along with a bike trailer full of camping gear. That bicycle trailer weighed about 60 pounds. The bike weighed about 45 pounds. I weighed… a lot. Total all up weight was around 430 pounds!
My son and I rode the eleven miles from South Reno to Davis Creek camp ground. That’s an easy ride, but not with a gigantic hill- very nearly a mountain pass- between them. Washoe Hill is about 1.5 miles long on the North side. Getting up it was strenuous, and involved walking. Going down it was strenuous too, because I was holding on for dear life.

The Hill of Doom viewed from the North
The reason for this is that in that 1.5 miles, it drops about 300 feet. It’s a 4.3% grade. Mind you I’m also carrying a trailer full of gear, the front brake is not effective, and I’ve got a single linear pull brake on a single wheel.
As the speed crept up, I applied the brakes. Very little happened. The speed kept increasing. I kept braking. Cars regularly traveled the road doing 55mph, and they were passing me less and less quickly. An honest estimate puts my top speed at about 45mph, but it may have been a bit more. You’ll notice too that the steering is remote- there is a tie rod going between the handlebars and the front fork. Had I not used high quality heim joints in that, I might not have made it down that hill. The front end was extremely light, and as I mentioned, a bit twitchy especially at speed.
What would I do differently? Disk brakes! I might even be inspired to do a linear pull brake and a disk brake if I thought I’d encounter any hills. This is going to be taken into account in my next recumbent. But, my next recumbent will not be a bicycle. It’ll be a trike of my own design. I hope to get going on that this winter. Thanks for reading!


3 pings
[…] things to build a recumbent bicycle. You need those things to build a high end recumbent bicycle. I built a recumbent bicycle using a homemade welder and Harbor Freight everything else. It wasn’t perfect but it worked […]
[…] In another post I also wrote about how I built a DIY recumbent bicycle and how I nearly killed myself on it. If you haven’t read that, go have a look Right Here. […]
[…] my last post I showed a new project: Building a recumbent trike, and making use of the welder that I picked up on Offerup last year. There’s been a lot of work done, and this post is to […]